Convert OsiriX ROI to Standard Formats
OsiriX is a widely used DICOM viewer for macOS, known for its user-friendly interface and advanced rendering capabilities. However, the ROI (Region of Interest) files exported from OsiriX are saved in a proprietary format called OsiriX SR, which can be challenging to work with.
This guide will walk you through the process of:
- Annotating ROIs in OsiriX,
- Exporting ROIs, and
- Converting them into standard formats including DICOM RTSTRUCT, NifTI, NumPy arrays, and PNG, and json files.
1. Annotating ROIs in OsiriX
1.1 Loading DICOM Data
To begin, load your DICOM files into OsiriX. You can either click the "Import" button in the top-left corner of the OsiriX window and select the folder containing your DICOM files, or simply drag and drop the files into the application.
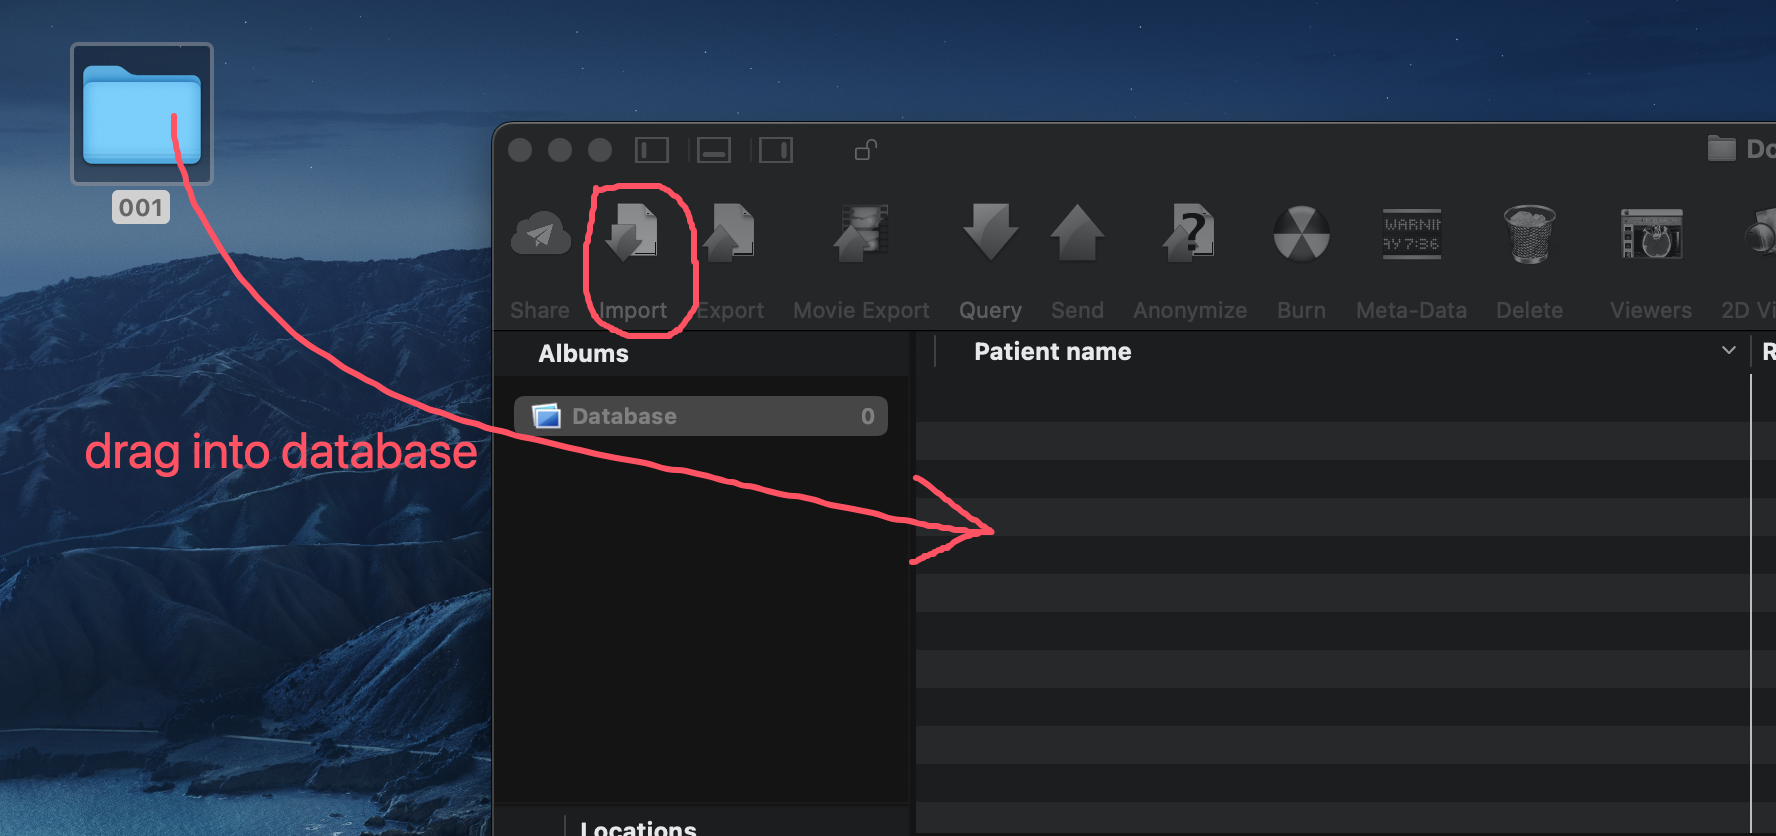
Load DICOM data into OsiriX.
1.2 Annotating ROIs
Open a series by double-clicking it in the OsiriX window.
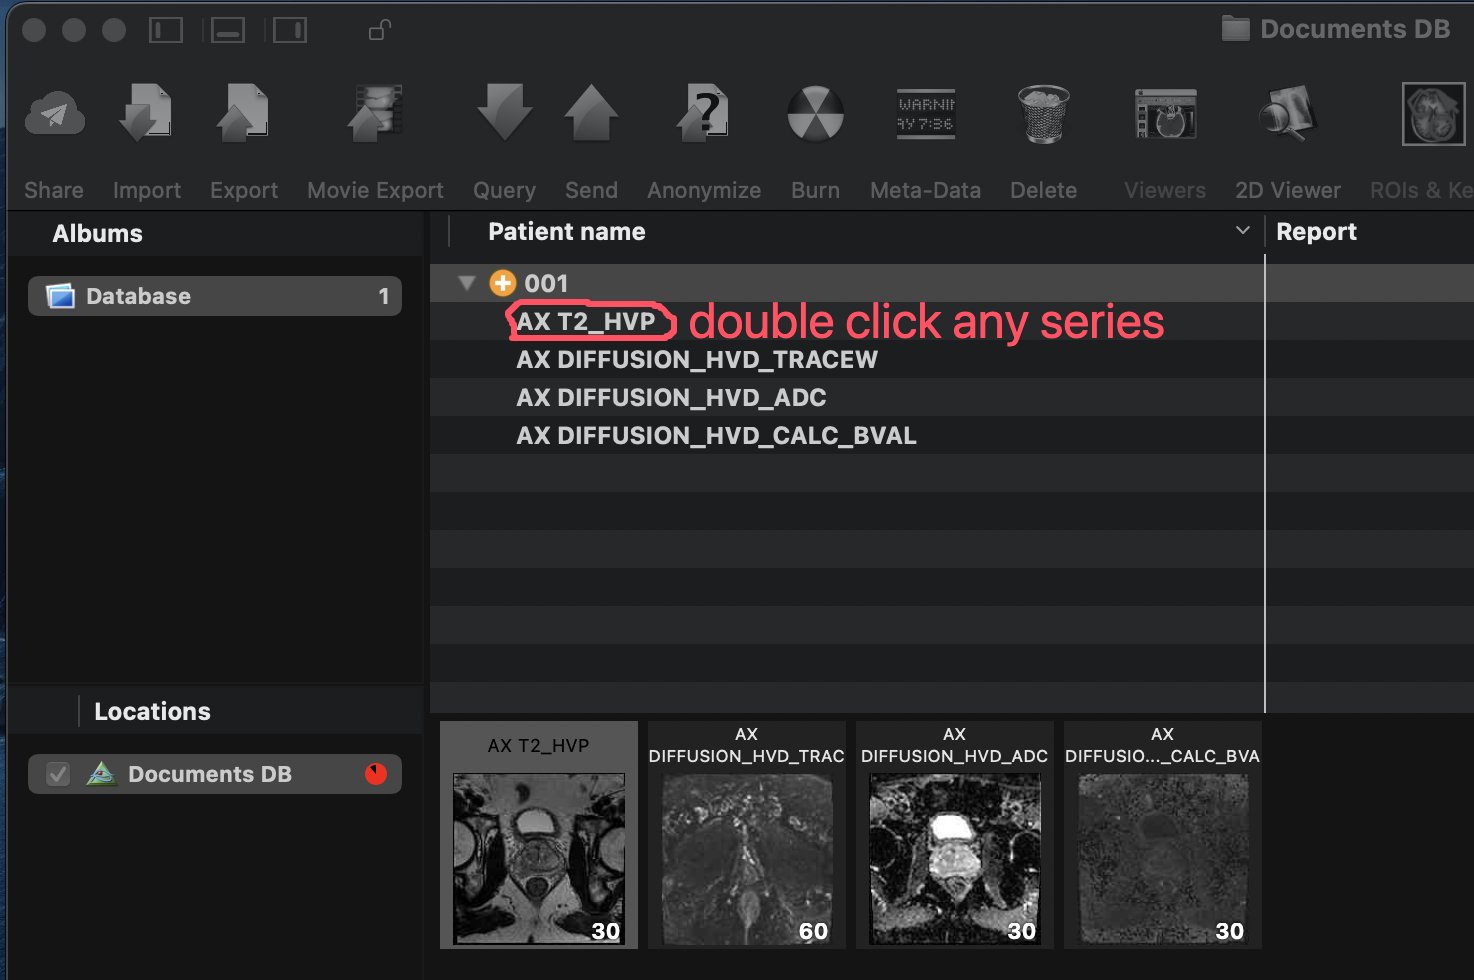
Double-click a series to open it.
Navigate through the slices using the arrow keys. Select the "Pencil" tool by clicking the "ROI" button in the top-left corner and start drawing ROIs on the slices.
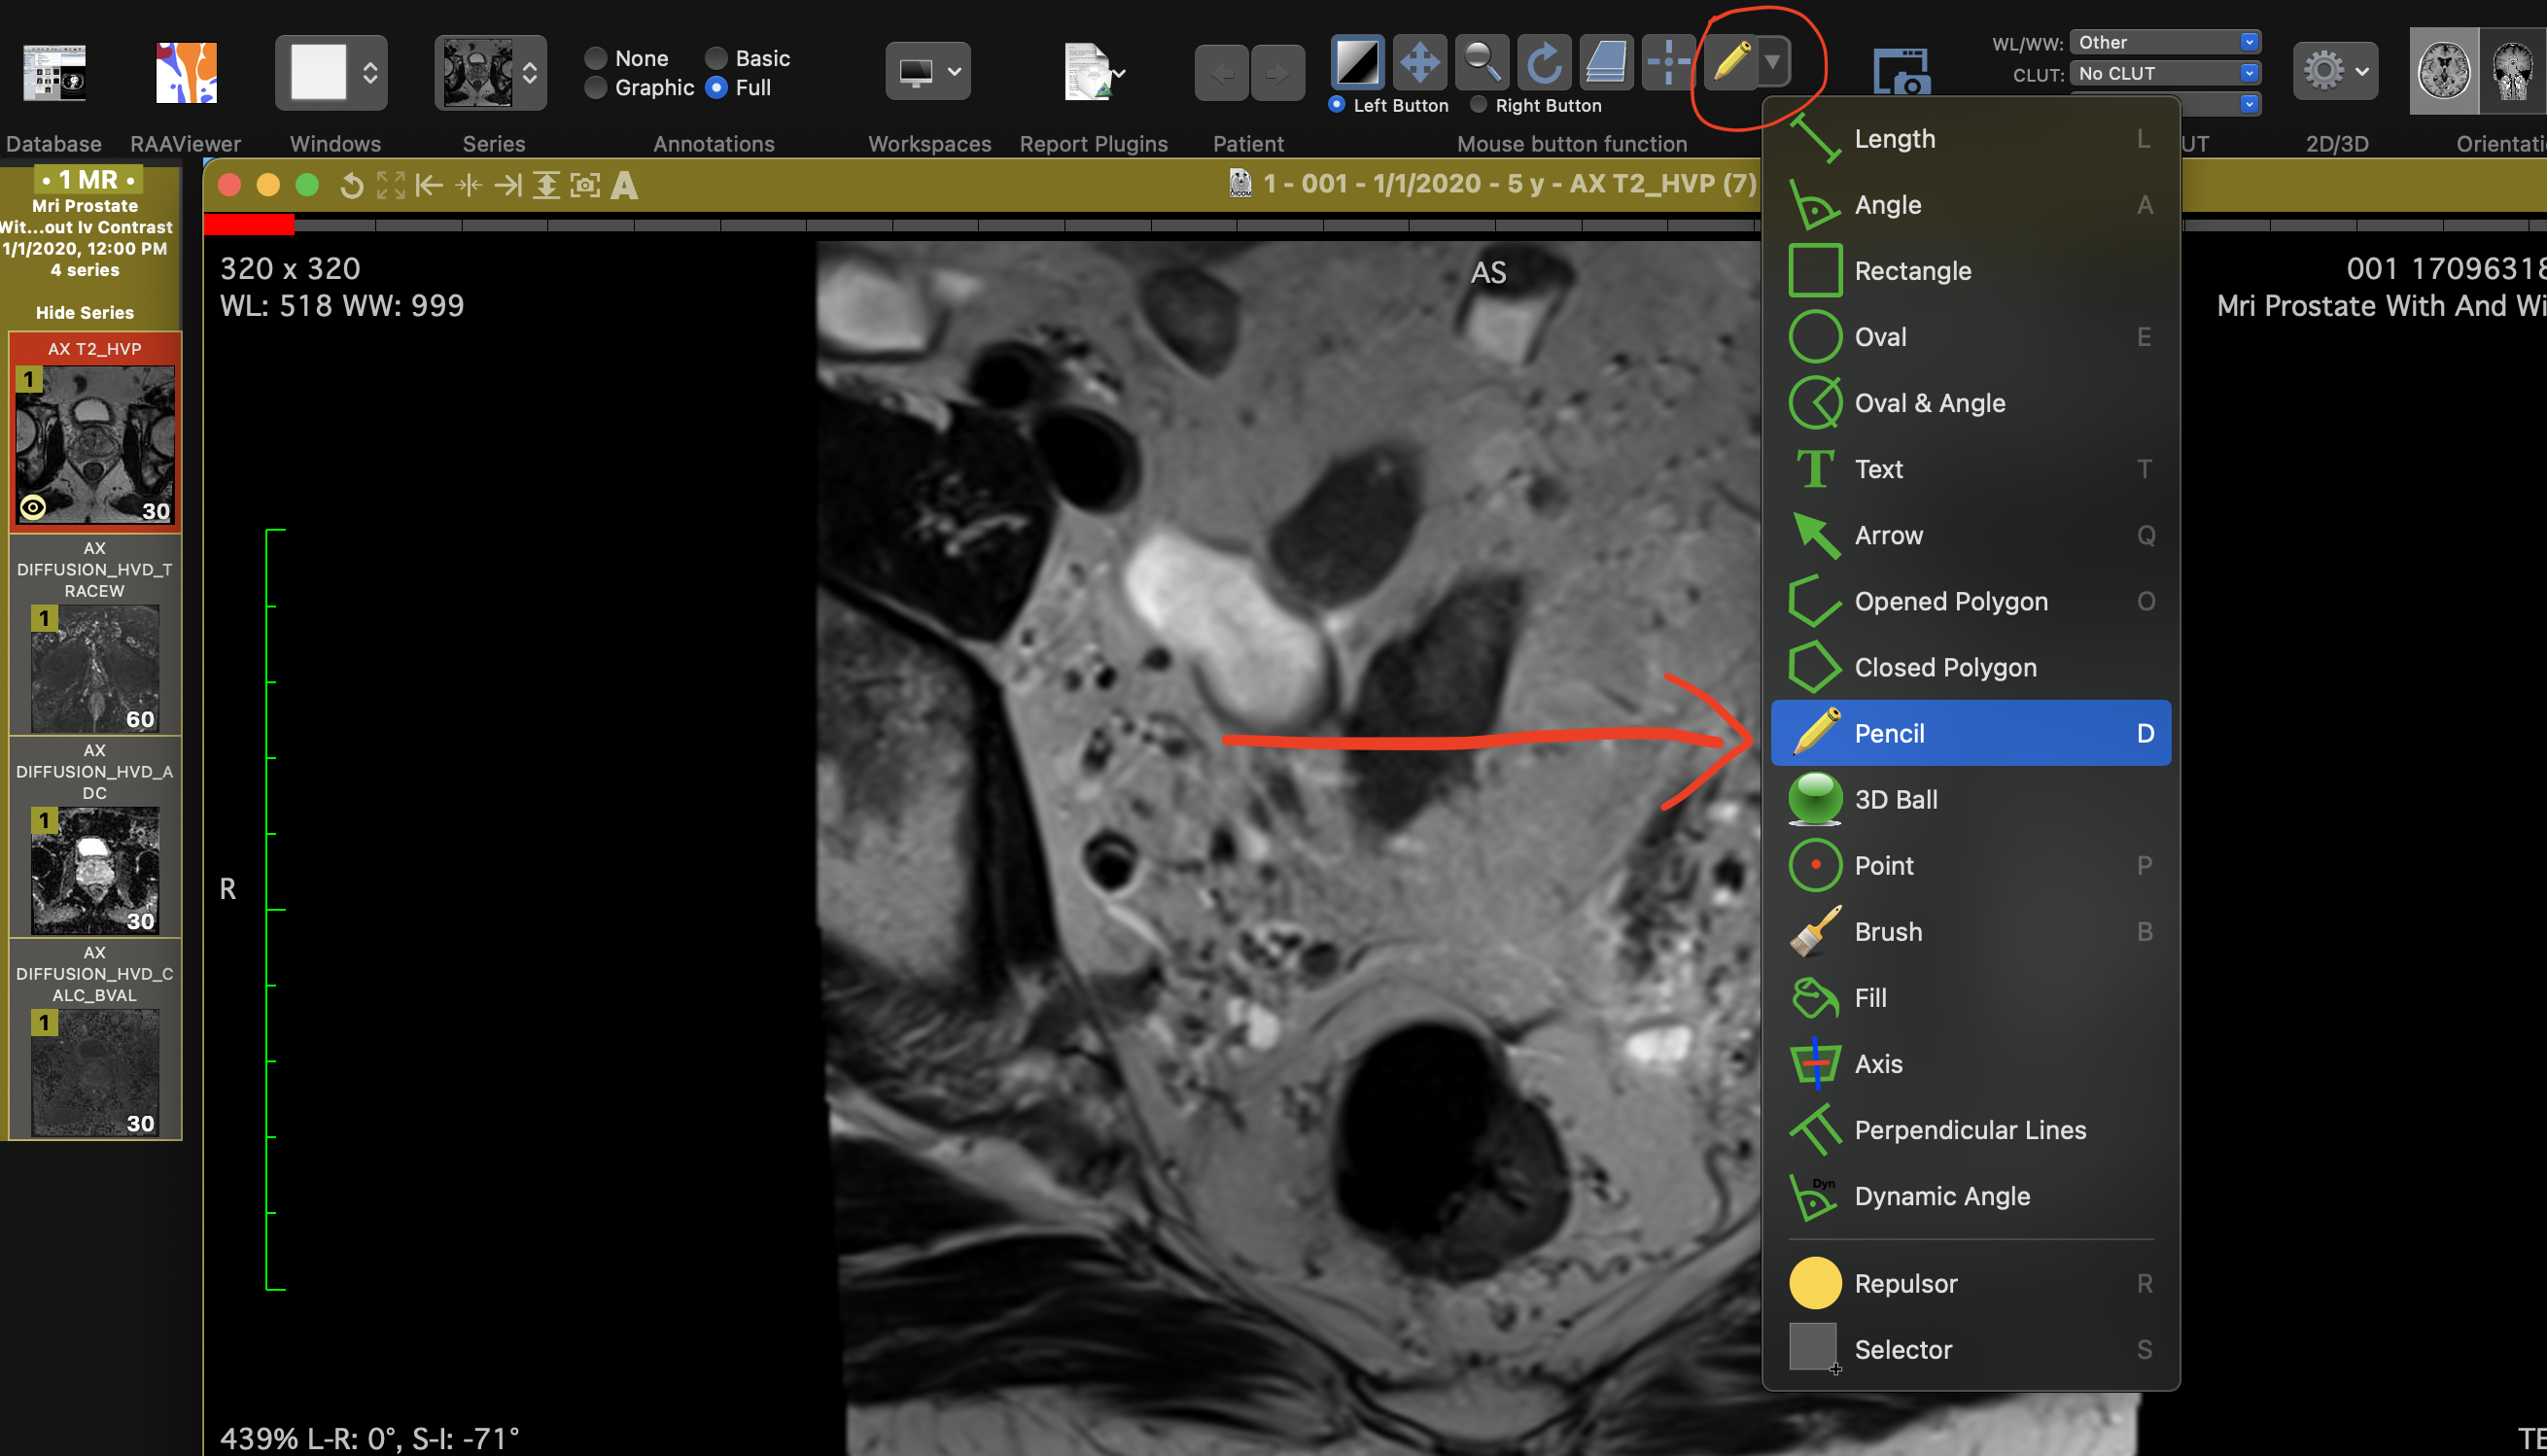
Select "Pencil" from the ROI tools.
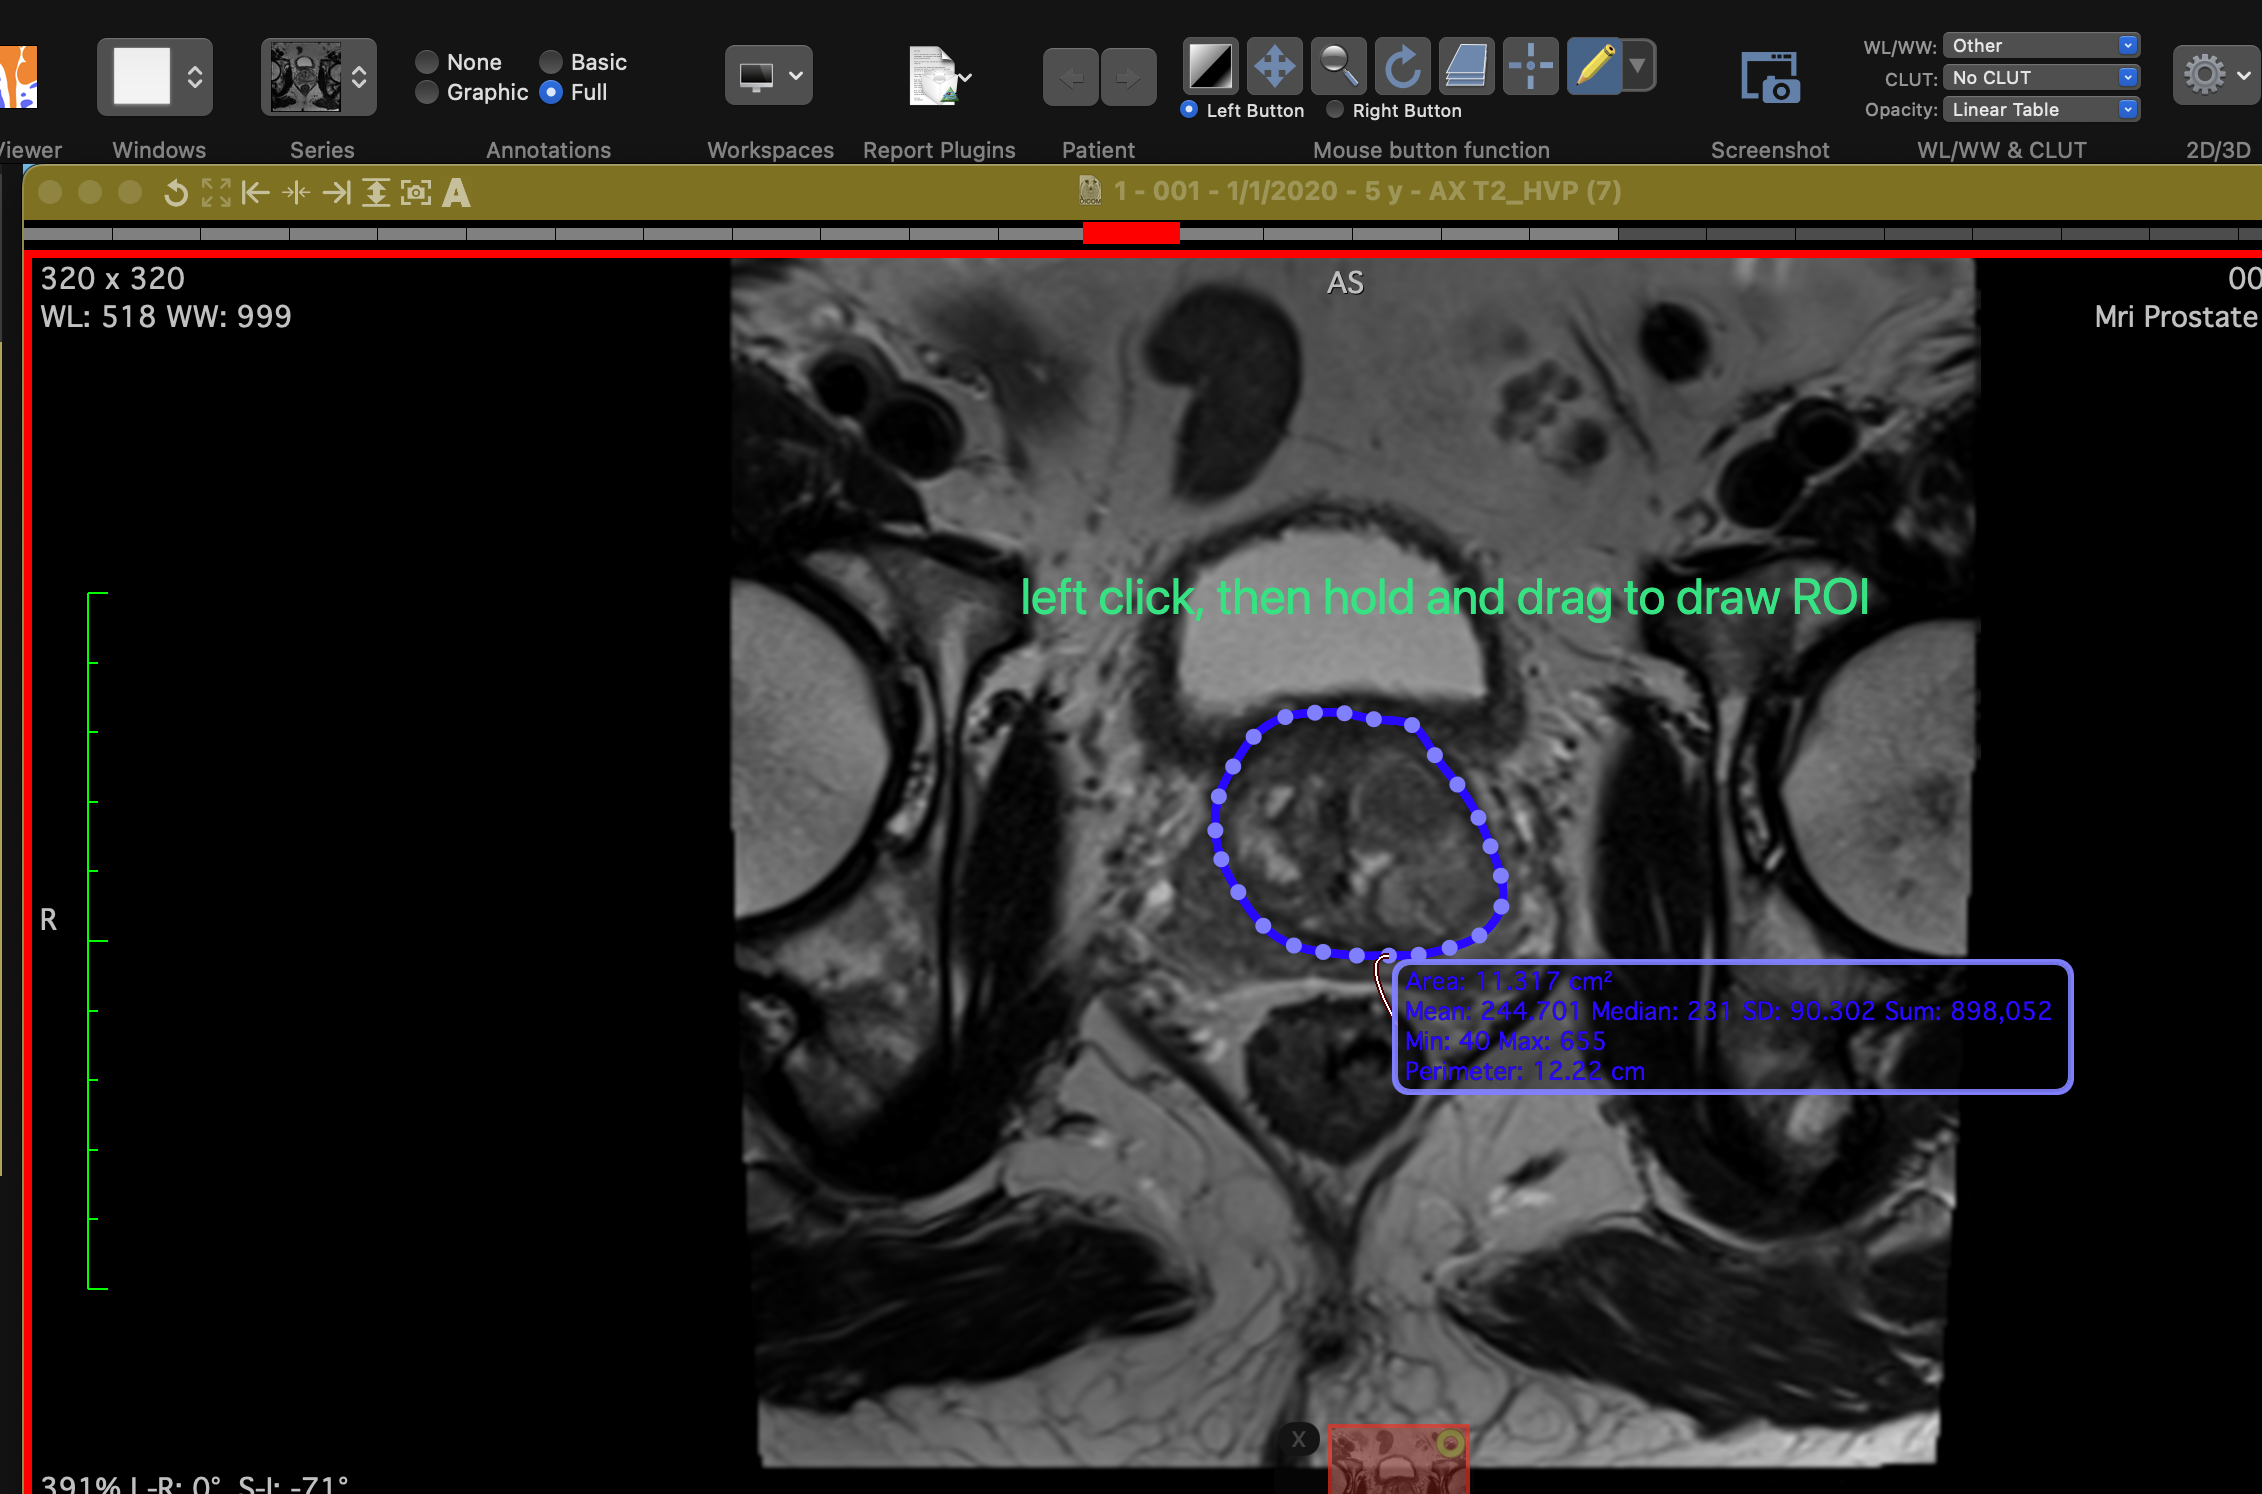
Draw ROIs using the "Pencil" tool.
1.3 Renaming ROIs
The default ROI name is "Unnamed". To rename an ROI, double click its information box and type a new name.
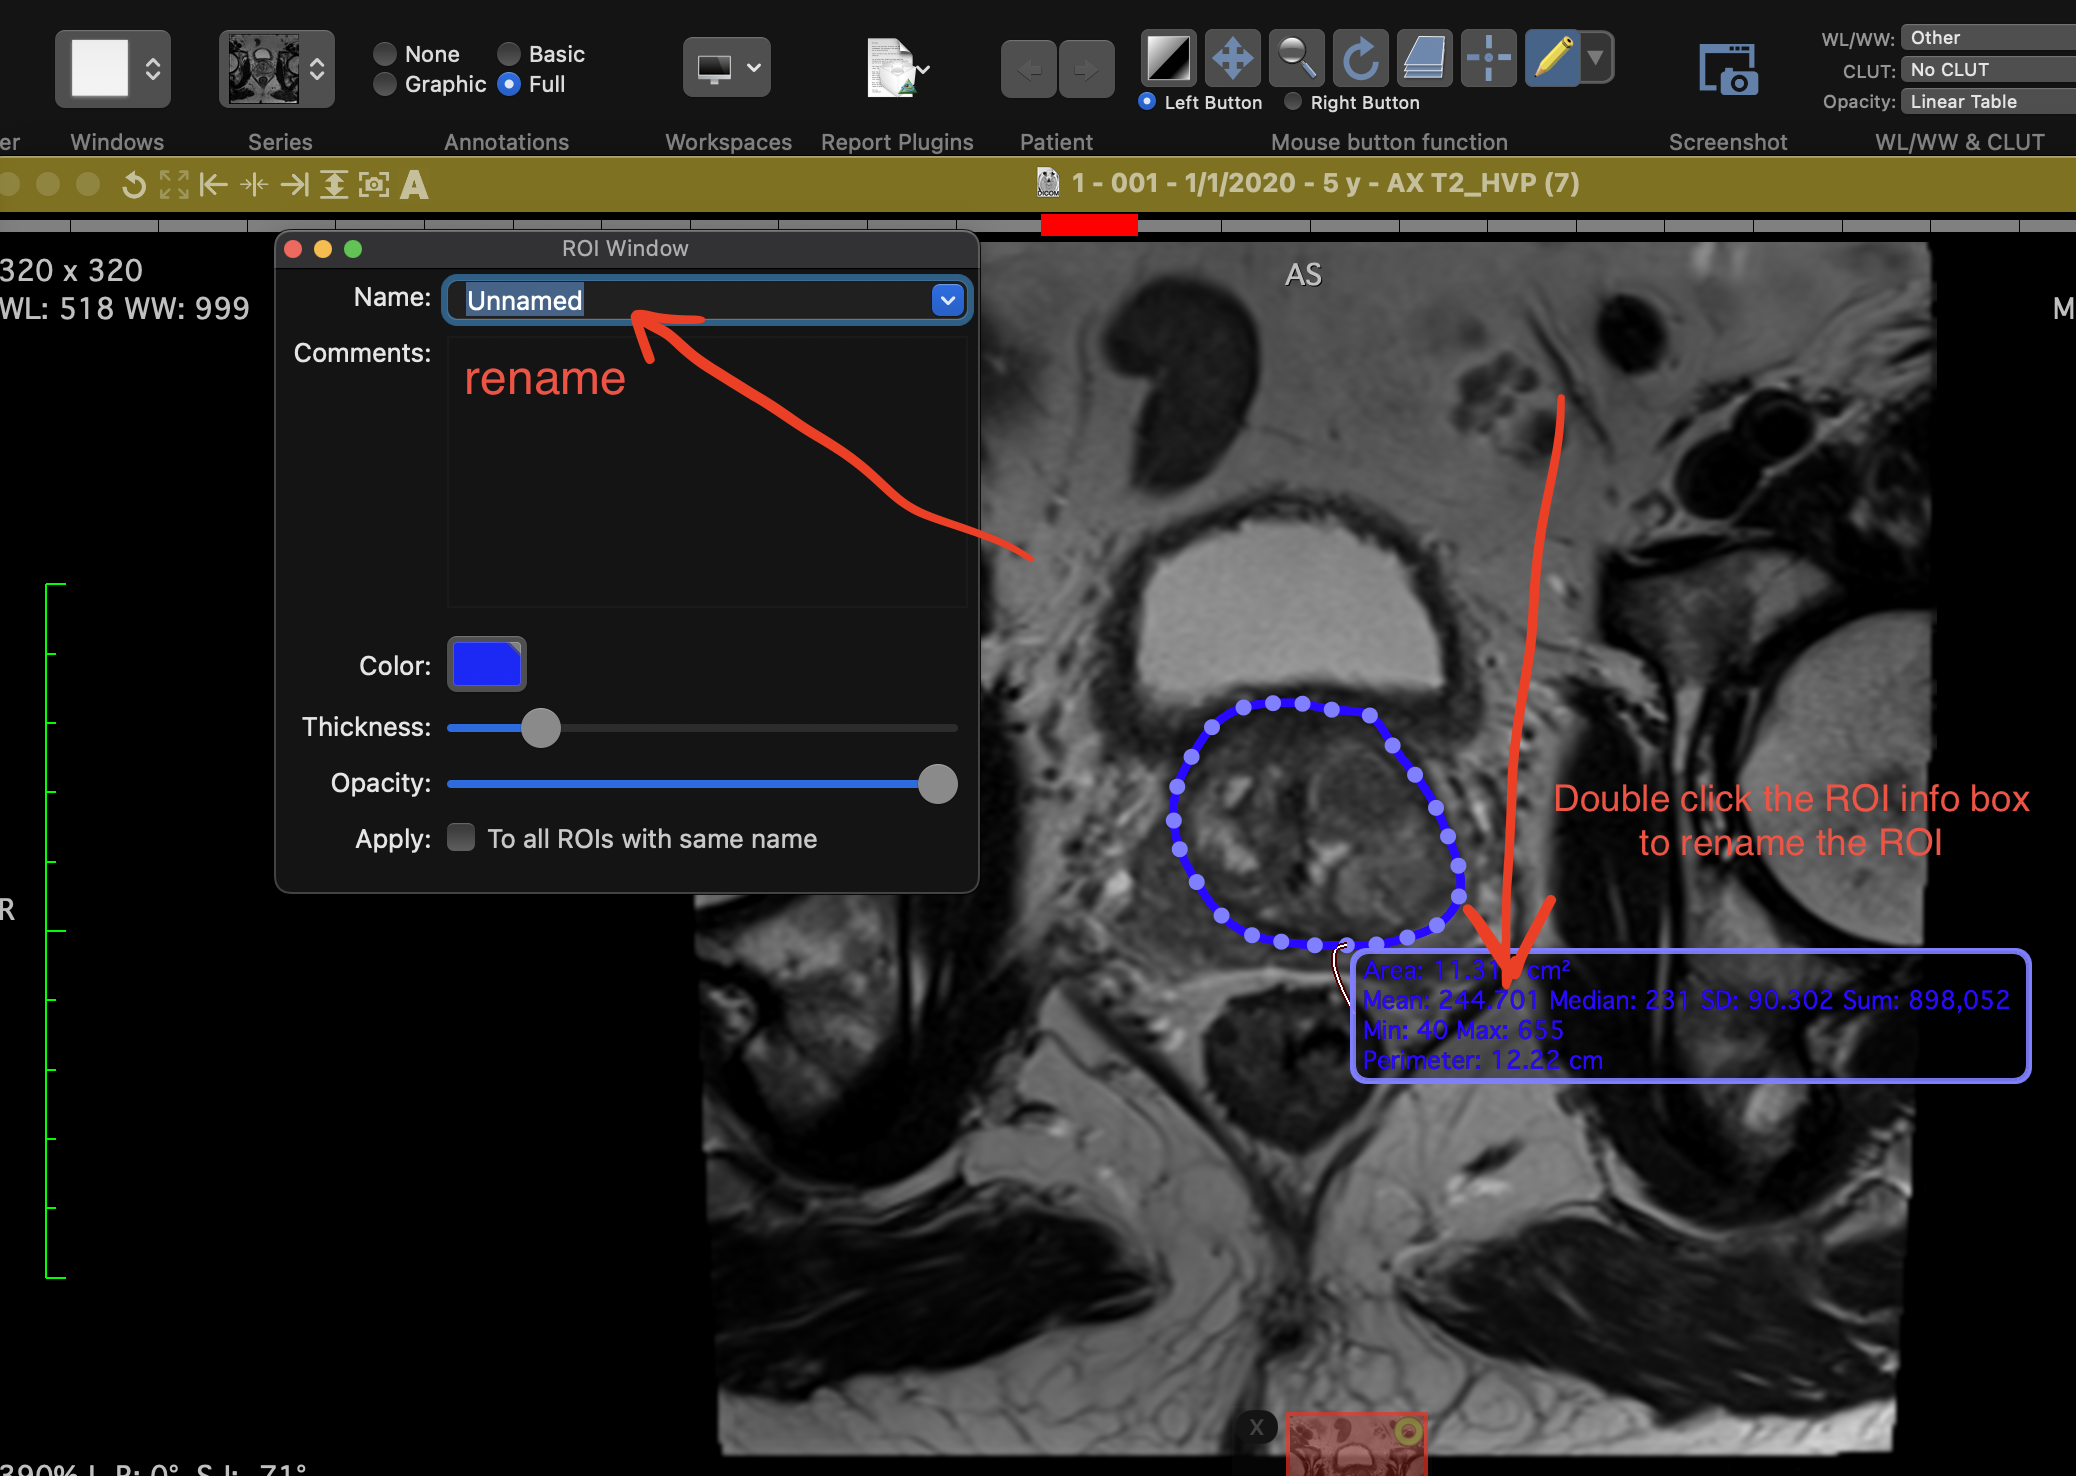
Rename an ROI.
You can annotate other series in the same way. To do this, select the series you want to annotate from the left panel and repeat the annotation process.
Once you've finished annotating, a green circle will appear in the top-left corner of the series, indicating that it contains ROIs.
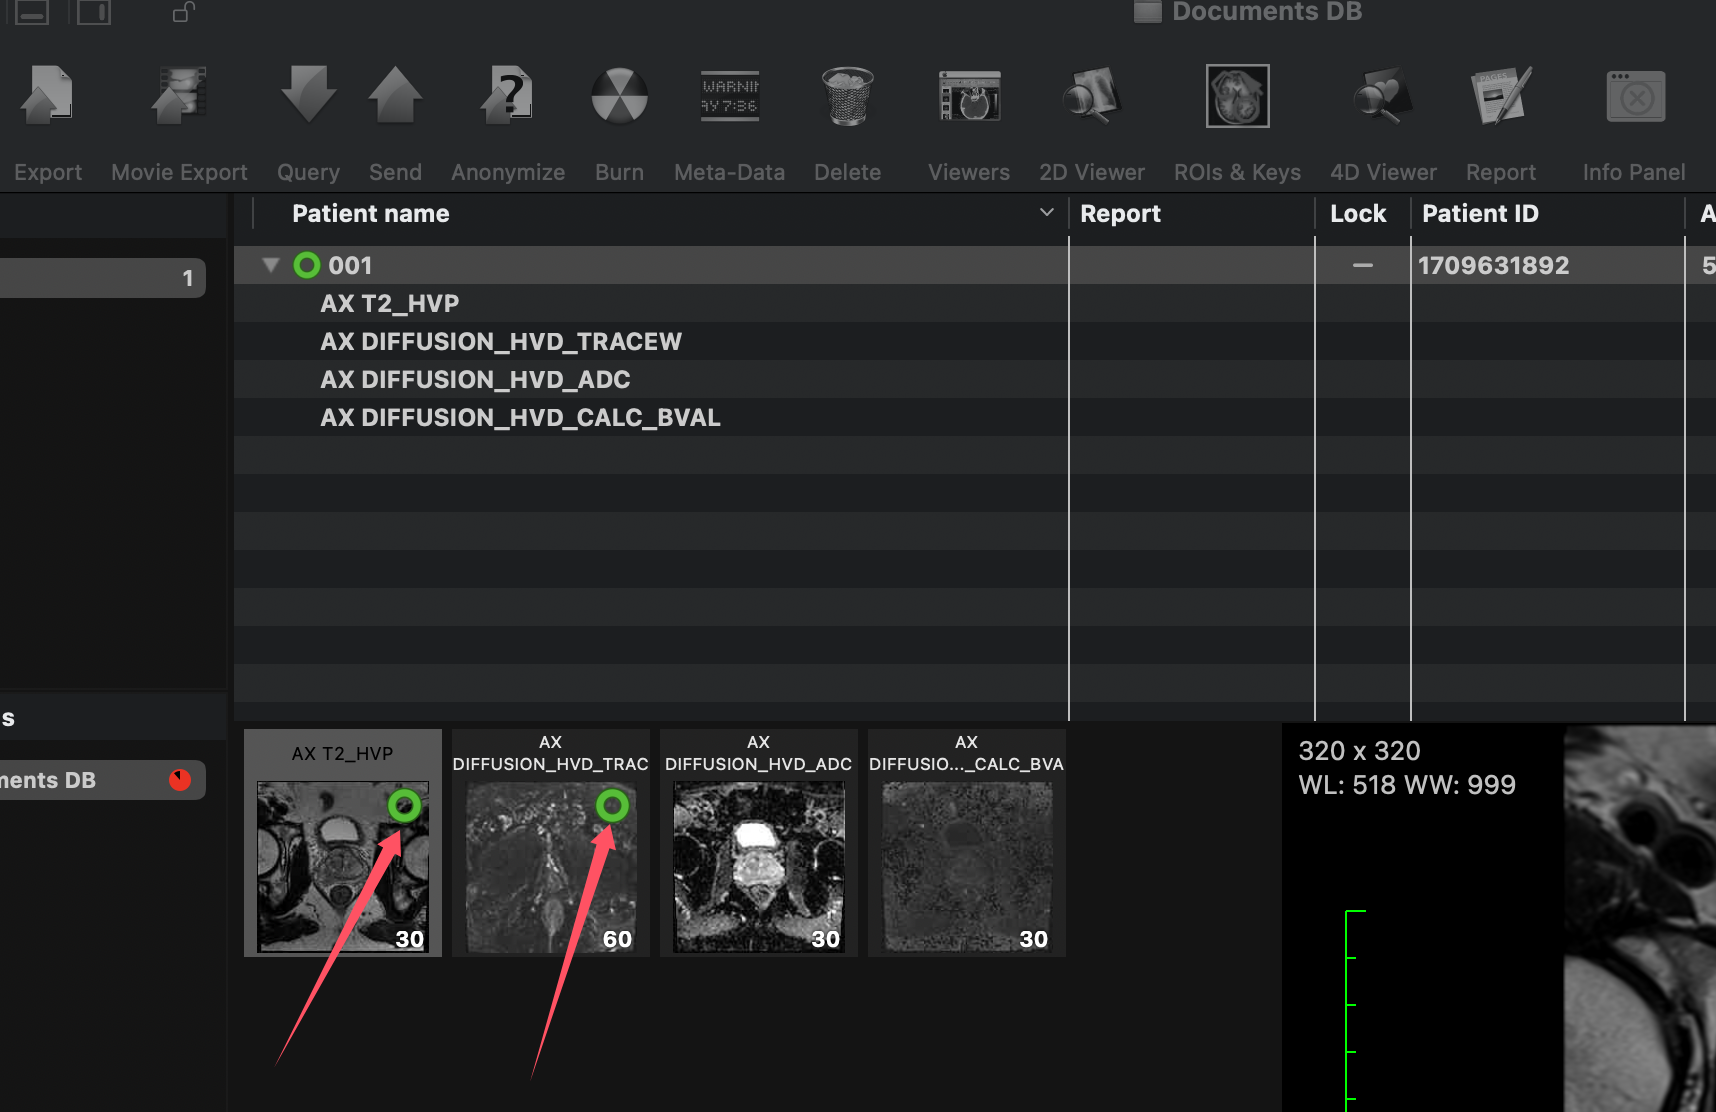
Green circles on the series indicate ROIs are present.
2. Exporting ROIs
To export ROIs, right-click on the Patient in the OsiriX window and select Export -> DICOM files.

Export ROIs along with DICOM files.
In the export window, ensure you check the Include ROIs, Comments, Reports checkbox. It's also recommended to check the Hierarchical checkbox for better organization.
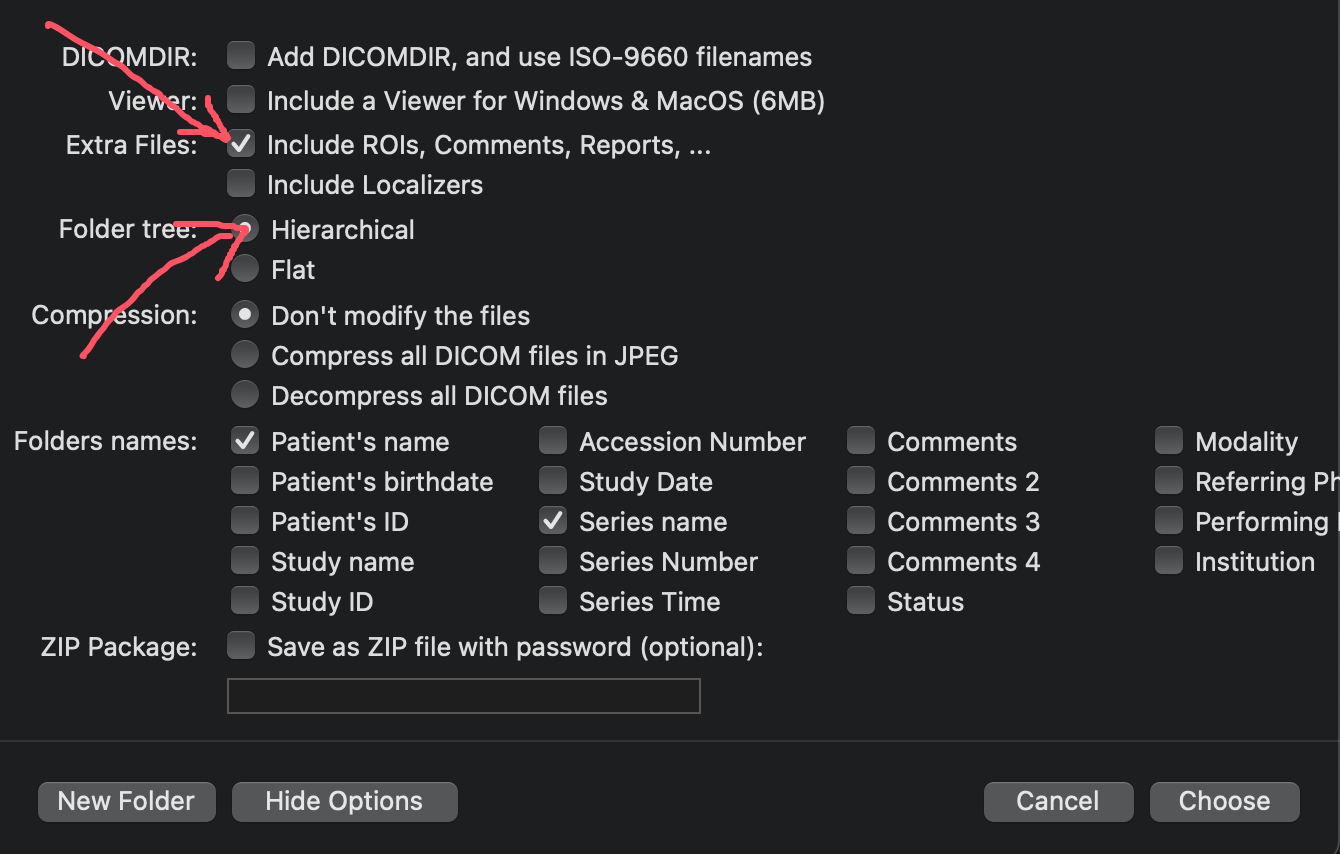
Ensure the "Include ROIs, Comments, Reports" checkbox is selected.
The exported folder will include an additional directory named OsiriX_ROI_SR, which contains the proprietary OsiriX SR files.
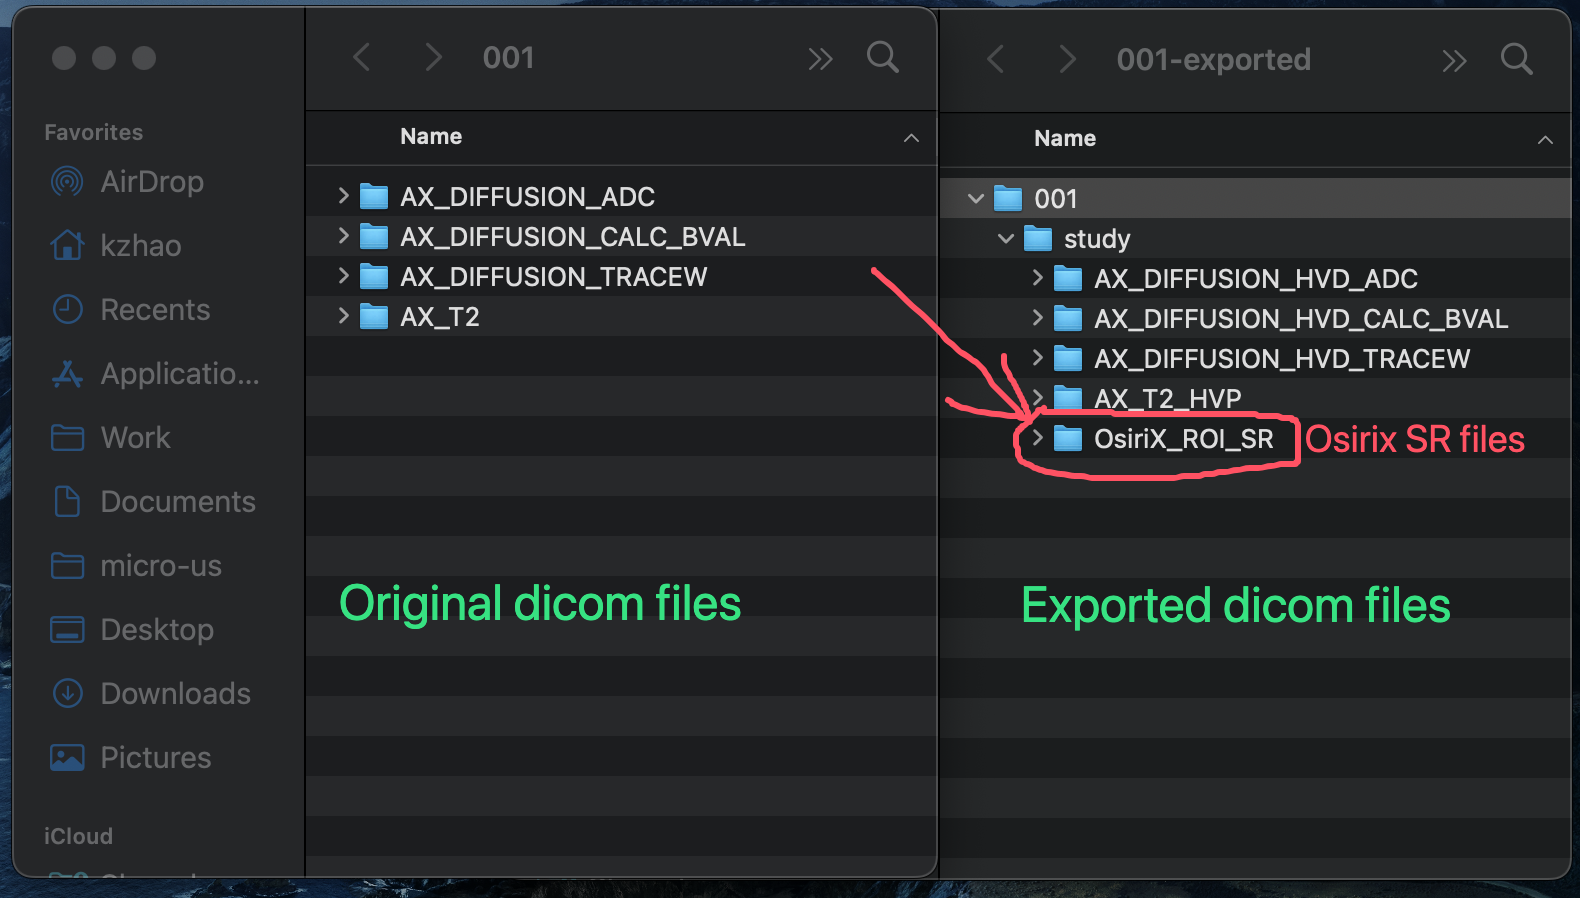
The "OsiriX_ROI_SR" folder contains the exported ROI files.
3. Converting ROIs to Standard Formats
To make the ROIs more usable, you can convert the OsiriX SR files into standard formats like DICOM RTSTRUCT, NifTI, NumPy arrays, or PNG files using the OsiriXConvert tool.
3.1 Downloading the Tool
Clone the repository or download the ZIP file from the GitHub page: https://github.com/intcomp/OsiriXConvert.
3.2 Installing Dependencies and Convert
# clone the repository
git clone https://github.com/intcomp/OsiriXConvert
cd OsiriXConvert
# install dependencies
pip install -r requirements.txt
# convert
python convert.py /path/to/exported
After conversion, there will be RT strut, NifTI, NumPy, and PNG files in the same directory as the exported patient folder.
Caveat
Inaccurate conversion to DICOM RT struct
How
The conversion from OsiriX SR to DICOM RT struct isn't perfect due to the limitations of rt-utils, which is used to create the DICOM RT struct. Rt-utils only supports binary masks as input.
In both OsiriX SR and DICOM RT struct, ROIs are stored as polygons (vertices coordinates). The converted coordinates in DICOM RT struct will be slightly different from that in the original OsiriX SR.
Why
Because rt-utils only accepts binary masks as input, I first rasterize the polygons into binary masks, which are then used as input for rt-utils to generate the DICOM RT struct.
The Rasterisation is not perfect and may lose information. In other words, we cannot recover exactly the same polygons from the rasterized masks.
Internally, rt-utils re-calculates polygons from the binary masks, which makes this conversion unnecessary. However, rt-utils currently only supports binary masks as input.
I’ve submitted a PR to add polygon support to rt-utils, but it has not been merged yet.